Using config transforms for IIS Express site on multiple ports
Manually configuring IIS for multiple hosts is time-consuming work. Here's how to use config transforms to speed up the task.
Problem
Running a Episerver multi-site solutions can be tricky and requires manual steps to set up.
The documented solution is to set up the web application in IIS and add bindings with different ports or hostnames (which also requires to update your HOSTS file).
But installing IIS and configuring IIS is boring. And every person who needs to run the solution will have to do it. So lets make this into a simple build and run solution.
Solution
Use xdt:transforms to append port bindings to IIS Express applicationhost.config file. Supported for Visual Studio 2015 and later.
1. Locate applicationhost.config, usually located at [solutionfolder]/.vs/[solution name]/config/applicationhost.config
Some times there is a sub folder. Then paths to this file in step 4 need to be updated accordingly.
2. Open config file and locate your site and id under configuration/system.applicationHost/sites, mine is 2.
Open config file and locate your site and id under configuration/system.applicationHost/sites, mine is 2.
3. Now make the transform file in your web project root: applicationhost.multisite.config and replace id and add your bindings.
applicationhost.multisite.config
<?xml version="1.0"?>
<!-- Multi site Transform for Development -->
<!-- This transform file is used when you need a multisite setup, each binding will setup IIS Express to run web app on spesific ports -->
<!-- Transform is run when building solution -->

<configuration xmlns:xdt="http://schemas.microsoft.com/XML-Document-Transform">
  <system.applicationHost>
    <sites>
      <site id="2" xdt:Locator="Match(id)"> <!-- replace id with your site id -->
        <bindings xdt:Transform="Remove" />
        <bindings xdt:Transform="InsertIfMissing">
        <binding protocol="http" bindingInformation="*:9328:localhost" /> <!-- repeat this line for every port you would like to bind to your web app -->
        <binding protocol="http" bindingInformation="*:9329:localhost" />
        </bindings>
      </site>
    </sites>
  </system.applicationHost>
</configuration>
File properties
- Change "Build action" to "None" and "Copy to Output Directory" to "Do not copy"
- Bindings in this file will overwrite what ever is configured in project csproj file.
4. Now we need the transform to run when building the application. Open your project .csproj file and append the following to the end:
...
  <Target Name="ApplicationHostsTransformsVS" AfterTargets="AfterBuild" Condition="Exists('..\..\.vs\[INSERT SOLUTION NAME]\config\applicationhost.config')">
    <TransformXml Source="..\..\.vs\[INSERT SOLUTION NAME]\config\applicationhost.config" Transform="applicationhost.multisite.config" Destination="..\..\.vs\[INSERT SOLUTION NAME]\config\applicationhost.config" />
  </Target>
  <Target Name="ApplicationHostsTransformsRider" AfterTargets="AfterBuild" Condition="Exists('..\..\.idea\config\applicationhost.config')">
    <TransformXml Source="..\..\.idea\config\applicationhost.config" Transform="applicationhost.multisite.config" Destination="..\..\.idea\config\applicationhost.config" />
  </Target>
</Project>
If you dont use Rider you can skip that section.
Now reload your Solution and rebuild project.
When starting application it should now run on defined ports.
Rider overwrites the changes every time you build. So you have to disable "Generate applicationhost.config" to make this work.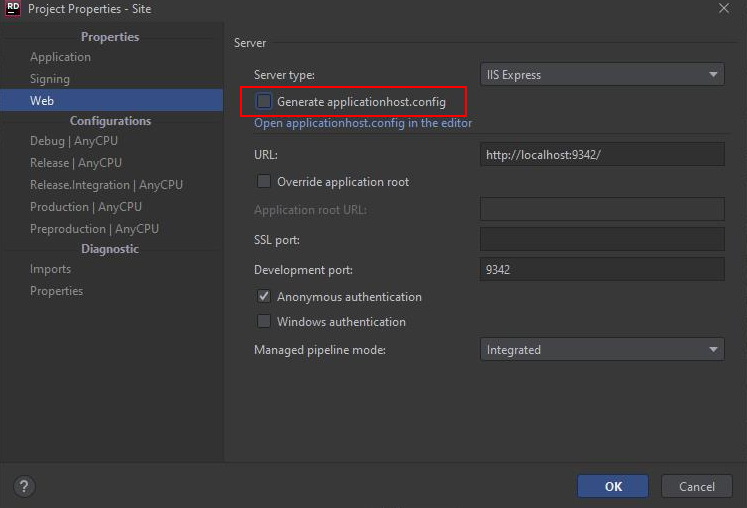
Verify
Verify by making another developer pull your code and starting it, and it should start on both ports.